Categories
Tiny Tina's Wonderlands

How to Beat Wastard in Tiny Tina’s Wonderlands: Boss Fight Guide

The Wasted, or Son of a Witch, is a sixth-boss with his body just beyond the positive headspace fast travel point. However, he has Skulls for weapons and skeleton armies at his disposal to fight against players in Tiny Tina’s Wonderland!

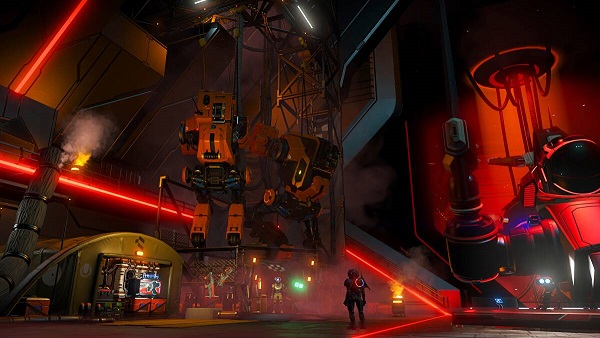
Tiny Tina’s Wonderlands Wastard Boss Fight

Here’s everything you need to know about beating Wastard in the game.

Phase #1

The Wasted Guardian is a tough-fought boss that does not have much weakness. Like most Leviathans, it has high resistance and health points for its class; however, this one also features regenerative abilities, which will make taking damage difficult if you cannot deal with them quickly enough through ranged or melee attacks. At the same time, they’re active during your first phase of the battle. After that, the player must protect their heads with the blue skulls, which are scarce, and shoot at enemies in a ranged attack. The main mechanic of this phase is using these rare items to block attacks from Wasted that will come after you!

Players should avoid these skulls at all costs. If you get hit by one of them, your entire protection bar will disappear and most likely leave behind some serious health drawbacks! Of course, you can use the creatures scattered around in this arena to hide from their attacks until it’s time for action again – but each class has its way of dealing damage here, so make sure not only do they have a good strategy before deciding on yours (or else risk fail) because there is no “best option.”

Phase #2

In the second phase of this battle, players will need to deal enough damage to it to cause a change in its appearance. Once they do so and enter into another stage (depending on how far into the fight you’ve gone), Wastard becomes known as an individual fighter with specific abilities at their disposal – but there’s no time right now! Again, avoidance techniques are key here; don’t let yourself get caught by any scratchings because those can hurt when trying to avoid getting hit back by your enemy and being able-bodied armored against potential attacks from all sides.
Phase #3

In this fight against the boss, players should focus on dealing Frost’s damage to defeat it as quickly as possible. Once defeated by their opponents’ skillful skills and hard work in Tiny Tina’s Wonderland, they will earn XP points to increase character levels or obtain better loot drops from future runs through Son Of A Witch if one wants more farming opportunities with little expense involved!

Need more help? See Legendary Weapons, Legendary Spells.

Categories
Guides

Rune Factory 5 SEED Points Farming Guide

In Rune Factory 5 (RF5), SEED points are a currency that you can purchase various items, including seeds and other equipment. Players can earn SEED points by completing certain tasks, such as defeating monsters or harvesting crops. Here are some tips on how to earn SEED points easily in RF5.

Rune Factory 5 SEED Points Farming

Kill Monster Bosses

In Rune Factory 5, players can fight Boss Monsters once a day to earn SEED points, money, and items for crafting. While the cost to ship certain item drops can be high, Boss Monsters offer an effective way to earn SEED points and items for crafting. By defeating a Boss Monster, players can receive 30 SEED points and access to limited items that can be used to craft powerful equipment.

1 Point for Each Living NPC

In Rigbarth, you may gain 1 point for each NPC you talk to. Yet, this may appear modest; conversing with individuals also raises your Friendship Level with them, so it’s worth considering as part of your daily routine.

Complete Requests

The Task Board is a great way to earn SEED points. Every time you complete a request, you’ll earn 100 SEED points. That’s a lot compared to other methods of earning SEED points. So make sure to complete quests as often as you can. You can also earn SEED points by carefully completing special tasks occasionally.

Shipping the Items

The Shipping Box is where you can send your items to the Blacksmith or other villagers. After shipping items, you will be able to receive a reward in the form of points, which players can be used to purchase items from the store.

There are many contests you can enter to win prizes. These include, but are not limited to, the Fishing Contest, the Cooking Contest, and the Crafting Contest. Each contest has different requirements, so read the rules carefully before entering.

Apart from these methods, some other ways can easily help you earn SEED points in RF5.

NPC Activities

You will get 3 points every time you do an activity with an NPC. This can be anything from fishing to cooking to playing games.

Destroying Regular Monsters (Maximum of 100 Points Per Day)

Take advantage of the opportunity to gain more than one point at a time by defeating Field Monsters. To earn 2 SEED Points, you must defeat Normal Monsters in the field; make sure to explore the area and attack any monsters you see actively. Unfortunately, this method allows you only to earn 100 points each day.

Accepting Clear Direct Requests:

You can earn the 200 Points by Accepting Clear Direct Requests. So, after every short break, check the request and accept them as they appear.

Need more help? See How to Grow Giant Crops, Love Potion Recipe.

Categories
Guides

How to Grow Giant Crops in Rune Factory 5

In Rune Factory 5, you can grow big crops using crop growth rates. This Guideline will teach you How to Grow Giant Crops:

Growing Giant Crops in Rune Factory 5

You can also cultivate crops on Farm Dragons, located south of SEED Outpost. You’ll acquire four Farm Dragons throughout the main story to increase your food supplies. Please make use of them to produce as many Crops.

If you till crops rather than harvesting them, they will nourish the soil. Corn is an excellent example because it provides nutrients to the ground.

You can buy Greenifier at Ludmila’s shop. It is located in the Southwest area of Selphie. You need to purchase it with 500 Friendship Points (FP).

To get Greenifier+, you need to combine 10x Greenifier and 1x Magic Water in a pot. Cook the mixture for 3 minutes, then wait for it.

When you continue to cultivate plants in the same soil, the quality of the ground degrades. The Magnifying Glass is an item that lets you check the quality of the ground.

If you want to get Giant Crops, you should use higher-level seeds. Seeds for crops start at Level 1, but you may raise their level by using a sickle on ripe crops.

Need more help? See Love Potion Recipe, Body Armor Recipes.

Categories
Guides

Lego Star Wars Skywalker Saga Master Codebreak-Out Minikit Locations Guide

In the Master Codebreak-Out mission in Lego Star Wars The Skywalker Saga, there are 5 Master Codebreak to find. This guide will discuss everything you need to know on how to find all Master Codebreak-Out Minikit Locations.

Master Codebreak-Out Minikit Locations

To your right is a cave with a broken switch at its end. To enter the cave, repair the button. The Minikit is inside the cave, where you’ll find a computer. Change the picture on the screen to all four characters to receive the Minikit.

Location #2: Prove your worth as a hero and obtain a droid to ride. Next, make your way through the prison to the central control room, where you’ll find the switch. A jail with the guard statue will reveal extensive paint splatters on the walls. To get it, reassemble the Minikit in the area’s corner.

Location #3: To earn a Minikit, go further into the cave and look for another shelter with a switch. Enter the cavern, and you’ll discover a machine. Remove the outer layer first, then use a grenade to destroy it. Silver bricks will be created as a result. After that, fill the container at the room’s rear with water. Then pull the lever on the other side to reveal a Minikit out of the box.

Location #4: To get the access code, you must go back to the start and use C-3PO Computer (Canto Bight Prison Safe Password) to decrypt it. Then drop down into the second cave on your right. Another C-3PO Computer may be found there. To obtain the Minikit, you’ll need to input the previous password.

Location #5: Finally, To access the Minikit, you must first reach the top of the Control Room, where you’ll discover the Minikit.

Need more help? See PC Crash Fix, How to Unlock Knights of Ren.

Categories
Guides

How to Get the Book Of Demons in Lost Ark

Lost Ark comes with a massive world to dig, battle, and look for collectibles. The Book of Demons is one of the many collectibles you can find in Lost Ark. The Book of Demons is a specific type of demon that can collect.

These demons are powerful creatures used to help you in battle. While they may be helpful, they can also be dangerous if not used correctly. It is up to the player to decide whether or not to use these demons to their advantage. This guideline will help you find the Book of Demons in Lost Ark and its use.

How To Get The Book Of Demons

NAPHTA is the only book merchant that sells Book Of Demons in Lost Ark. For sure, you will find the NAPHTA in the large orchards and farms of the Flowering Orchards area of East Luterra.

After finding him, you can purchase the Book of Demons from Him. However, you need to spend 250 shillings to buy the book. Meanwhile, if you sell the book, you will get only 13 silver which is heart-breaking. There is no coming back once you traded with NAPHTA; keep that in mind.

What to Do With a Book of Demons

While the use of the book is still ambiguous, the players that have already acquired it are confused about its use. The contents written in the book are in a very ancient language, which is not understandable. However, some things can be gleaned from the book. While the full extent of the book’s power is still unknown, it is clear that it could be a valuable asset to any mage or sorcerer.

There is a great debate among players as to whether or not the book is worth purchasing from the NAPHTA. Some think there is a quest in the same region where you will need this book. It is to be noted that there is no know use case for the Book of Demons in Lost Ark.

While the purpose of this book is not currently known, it is safe to assume that it will be discovered in the future. With regular updates, the book’s purpose will eventually be revealed. For now, however, the book is useless. This problem can be solved by simply being patient and waiting for future updates.

Need more help? See How to Unlock Hall of Silence, Rethramis Cooking Recipes Locations.

Categories
Elden Ring

How to Get to Jarburg in Elden Ring

To get to Jarburg in Elden Ring, players need to progress through the game until they reach the Lands Between area. Jarburg is located in the southwest corner of the map and is only accessible by crossing a small bridge. Once players have reached Jarburg, they will need to talk to the Warrior Jars to progress the questline.

The Warrior Jars will direct players to the Living Jars, giving them a quest to retrieve a flower from a nearby cave. After completing this quest, players will be able to enter Jarburg and explore the village.

There are several ways to get to Jarburg in the Elden Ring. Of course, the easiest way is to hitch a ride with one of the many merchant caravans that travel between the major cities. However, if you’re looking for more challenges, you can always take the longer and more dangerous route through Liurnia of the Lakes. While this may take longer, it’s worth it for the experience and the loot. Just be sure to watch out for monsters!

Jarburg: The Warmest Place in the Lands Between

Jarburg is a town that sits on a cliffside and is home to only Living Jars. These jars spend their days dancing, laying in the grass, or growing rare flowers. Jarburg is a wonderful location to gather crafting materials and a few uncommon blooms like Miquella’s Lily. Diallos will eventually arrive in Jarburg and play an essential role in the town’s prosperity. The town has a problem with erosion, but Diallos can help by using his magic to grow plants that help hold the soil in place.

Iron Fist Alexander is a strong warrior who hails from Jarburg. He left his home long ago to become stronger and has sworn never to return. This is not because he is full of malice or shame, but because he believes it is best to move on from the past and focus on the present.

Additionally, he believes that the “warrior’s path” must be walked alone. So, it has allowed him to become a powerful and skilled fighter. He is now known throughout the land for his prowess in battle, and many people seek him out for help when they are in need. Yet, despite his impressive skills, he remains humble and always puts others before himself.

How to Get to Jarburg

The only way to access Jerburg is by heading to one of the Sites of Lost Grace in southeast Liurnia, and from the north end of the village, continue forward to the Carian Study Hall. Jarburg is a small, hidden area on the cliffs below the Carian Study Hall. A cliff is located just to the south of this location that has an outcropping that players can climb their way down to if you look over carefully.

Once players have made their way down the cliff, they will find themselves in Jarburg. Jarburg is a peaceful area with plenty of trees and flowers. The area is also home to a few small ponds, perfect for a refreshing dip. Yet, Players can also find a few small caves in Jarburg.

The Jarburg Steppes Cliffside Jumping Puzzle is for you if you’re looking for a challenge. This puzzle will test your agility and problem-solving skills in the southern part of the map. Success is taking your time and looking for the best route down.

There are plenty of ledges and jutting stones to help you make your way down, but be careful not to fall. Torrent, your trusty mount, can help you get down some of the tougher sections if you get stuck. Just be sure to let go of the thumbstick after each jump to prevent him from overshooting the landing.

Categories
Guides

No Man’s Sky Outlaws Infinite Money Glitch Explained

The No Man’s Sky Outlaws update has been great for players to provide new content and features. However, a glitch has been discovered that allows players to generate infinite money and nanites. This is done by following specific steps that take advantage of the game’s system.

In No Man’s Sky, you explore an infinite procedurally generated universe while striving to survive. The game is renowned for its vast scale and scope, but one of its most recent patches has introduced a game-breaking glitch that allows players to generate infinite money and nanites. Nanites are used to purchase different upgrade modules for both the multi-tool and any vehicle, but they’re also needed to upgrade any ship from one class to another.

While this glitch will likely be patched as soon as Hello Games can get to it, now is the time to purchase any upgrades and sell the appropriate items to enhance all gear completely. With this infinite money glitch in No Man’s Sky, there’s never been a better time to explore the universe and find all of its secrets.

How to Do the No Man’s Sky Outlaws Infinite Money Glitch?

No Man’s Sky players looking for an easy way to make some quick money will be happy to know that there is new infinite money exploit. With the release of the No Man’s Sky Outlaws update, players can now sell stacks of items from their ship’s cargo inventory. This means that players can repeatedly sell the same stack of items if they don’t remove the items from the cargo inventory.

However, it should be noted that the value of the items will decrease each time they are sold, so players will need to carefully balance their need for money with the need to keep their reputation high. Thanks to this new exploit, No Man’s Sky players will never have to worry about money again.

The process is moderately simple if you’re looking to get infinite nanites in No Man’s Sky. You need to purchase an upgrade module from a salvage dealer at any outlaw station, store it in your ship’s cargo inventory, and then sell it to the vendor.

This is a great way to get infinite nanites if you’re trying to upgrade your ship or equipment. The item will not disappear from your cargo inventory, and you’ll be able to get an unlimited supply of nanites. Thanks for reading, and I hope this helps!

Need more help? See How to Create Squadron.