Categories
God of War: Ragnarok

How to Upgrade Heavy Runic Attacks in God of War: Ragnarok

God of War: Ragnarok is launched on 9 November and is available on PS4 and PS5: God of War: Ragnarok is an upcoming action-adventure game developed. The game features tougher enemies than before, so you’ll need to use every advantage at your disposal. One of the best ways to make yourself more powerful is to upgrade your Heavy Runic Attacks. In this guide, I’ll tell you how to upgrade Heavy Runic Attacks in God of War: Ragnarok.

God of War: Ragnarok has many weapons that can be used however you want. Runic attacks are booster items that can be used with any weapon to make them more powerful during challenging battles.

If you’re a fan of the God of War game series, then you’ll probably know that Ragnarok has inherited quite a few features from its predecessors, including special skills that can be attached to your favorite weapon. Therefore the same goes for the Runic attacks, as they have both light and heavy versions:

  • Light Runic Attacks: You don’t have to do anything special to unlock light runic attacks- they are automatically available to you as you play the main storyline.
  • Heavy Runic Attacks: You need to unlock Heavy Runic Attacks so that you can use them.

Upgrading Heavy Runic Attacks:

You can only upgrade your Heavy Runic Attack ability if you have enough EXP. To check if you do, open the tab at the bottom and look for the ‘equip’ option next to Heavy Runic Attack. If it’s available, press the ‘upgrade’ button below it.

Heavy Runic Attacks are essential for battle and can be found as rewards for completing certain boss fights or from Legendary Chests located throughout the map.

Categories
God of War: Ragnarok

How to Solve Mine Puzzle in God of War: Ragnarok

During the main Story Mission, “The Quest for Tyr,” you come across the Mine Puzzle in the God of War: Ragnarok. Kratos and Atreus discover a mineshaft with manmade waterways while exploring Svartalfheim. The task here is to cross the opening; you’ll need to use the crank to turn it. So if you’re stuck on the Mine puzzle in God of War: Ragnarok, don’t worry- I’ve got you covered!

In the Mine Puzzle, some pathways need to be blocked while others should be left frozen. Although it might appear to be complicated, it’s really not. Time is of the essence, so without further ado, take out the frozen ax. You’ll need to throw the ax at precisely the moment right before the water wheel on the Eastern side. As a result, the platform will move to the right side, and Atreus will have the chance to arrange rocks in a way that blocks the water path. Repeat this process on the other water path so that Atreus can reach the end by throwing rocks.

When you look at the Eastside, you will notice the water is pushing the water wheel, which you need to stop by freezing the water. As a result, the platform will move towards the west side to collect water from another source. Once you have done this, call out the Atreus for pushing the water wheel and blocking way rocks.

After you observe the water will be pushing east, you need to freeze the water to instantly halt it. Doing so will then move the platform towards Atreus on the other side. He is your companion who assists with tasks such as these, including pushing boulders that are blocking your path. In order to progress south, you need to use the ax to the frozen water and turn the wheel. After you’ve made it across, have Atreus shoot the rocks to unblock the water path. As a result, the platform will be clear, and you can reach your destination.

This is how you can easily solve the Mine Puzzle in God of War: Ragnarok. For more tips and strategies, you can check out our detailed God of War: Ragnarok wiki page.

Categories
God of War: Ragnarok

How to get Folkvangr Whetstone in God of War: Ragnarok?

It’s always important to have better gear in any game, but it’s especially important in God of War: Ragnarok. This is because the game is extremely challenging and difficult, and you need all the help you can get. One of the best ways to get better gear is by finding Folkvangr Whetstones in God of War: Ragnarok. These items are scattered around the game world and can be found by exploring. They give you a significant boost to weapons, so they’re definitely worth seeking out. In this guide, I’ll tell you how to get Folkvangr Whetstone in God of War: Ragnarok.

The Folkvangr Whetstones light upgrades will be useful to you until you finish the game, but they are available in the middle of gameplay. If you complete the main story mission, “Forging Destiny,” you will come across a Legendary Chest. After opening this chest, you’ll receive the Folkvangr Whetstones as a reward. You can also get these whetstones by completing side quests like Favors. Even in some cases defeating enemies will earn you the upgrades.

The next step after you get the Folkvangr Whetstone is to take it to Brok and Sindri’s shop. You can exchange the Folkvangr Whetstone for one of Freya’s swords. Since only one stone is needed per level of the sword, they are quite rare items.

Categories
God of War: Ragnarok

How To Unlock Jungle in God of War: Ragnarok

While playing the God of War Ragnarok, To access the jungle area in the crater for which you must first complete the “Scent of Survival” Favor mission. In this guide, I’ll tell you how you can reach the jungle in God of War: Ragnarok.

From the gateway, climb up the wall on the north side. Then turn left and drop down the wall between two pillars.

Once you enter the gateway, there will be a wall to your left that you’ll need to climb. The next step is to take a sharp left turn and go in between the pillars. Take a left turn, and you will see the rock. There is a branch you can use as a bridge to get to the opposite side, so jump on it and climb up the wall.

Make a left turn so that you can see a small puddle of water and, after it, the Celestrial Altar. In order to reach the small tunnel on the left, you will need to take a right from the puddle.

From the Celestrial Altar, climb down and head east. Then take a right, and continue climbing up the wall until you reach a cave with another cave behind it. For this next part, make sure to stay close to the right wall so that you don’t lose your way.

Essentially, what you want to do is continue making your way through the cave until you reach a point where there’s a gap in the floor that’s too big to jump over. Climb the left wall to reach the other side. You will find a hole in the left wall– pass through it to enter and unlock the jungle.

Categories
God of War: Ragnarok

How To Upgrade The Blades of Chaos in God of War: Ragnarok

The Blades of Chaos is a powerful weapon in God of War Ragnarok. You can mold it to fit your playing style and upgrade it to make it even more powerful. In this guide, I’ll show you how to upgrade the Blades of Chaos in God of War: Ragnarok so that you can defeat your enemies more easily.

The Blades of Chaos was originally from the predecessor in the God of War series. The requirement for upgrading this weapon is to find the Chaos Flames, which are scattered in the Nine Realms. Below I’ve mentioned some of the locations where you will find the Chaos Flames:

Chaos Flame #1
The first Chaos Flame is obtained by defeating the Dreki in Svartlefheim during the “Tyr” quest.

Chaos Flame #2
The second Chaos Flame is obtained by defeating the Forest Ancient in Vanaheim during the “The Reckoning” quest.

Chaos Flame #3
The third Chaos Flame is obtained by defeating the Frost Phantom in Midgard during the “Creatures of Prophecy” quest.

Chaos Flame #4
The fourth Chaos Flame is obtained by defeating the two Drekos in Vanaheim during the “Creatures of Prophecy” quest.

Chaos Flame #5
The fifth Chaos Flame is obtained by defeating the Soul Eater in Muspelheim during the “The Summoning” quest.

After getting the Chaos Flames, you need to reach the Blacksmith in the world to upgrade the weapon.

Categories
God of War: Ragnarok

God of War: Ragnarok Guiding Light Armor Set Location Guide

When you journey to Nine Realms, you won’t earn armor from every quest in the God of War: Ragnarok. After Kratos and Freya return to Midgard and Atreus leaves with Thor, you must start the Guiding Light quest by visiting the Temple of Tyr. To progress, you must find the four statue pieces of Tyr. By reading the runes on these statues, you will be able to unveil more about the new story and earn some spectacular new armor. In this guide, I’ll tell you how to get the Guiding Light Armor Set in God of War: Ragnarok.

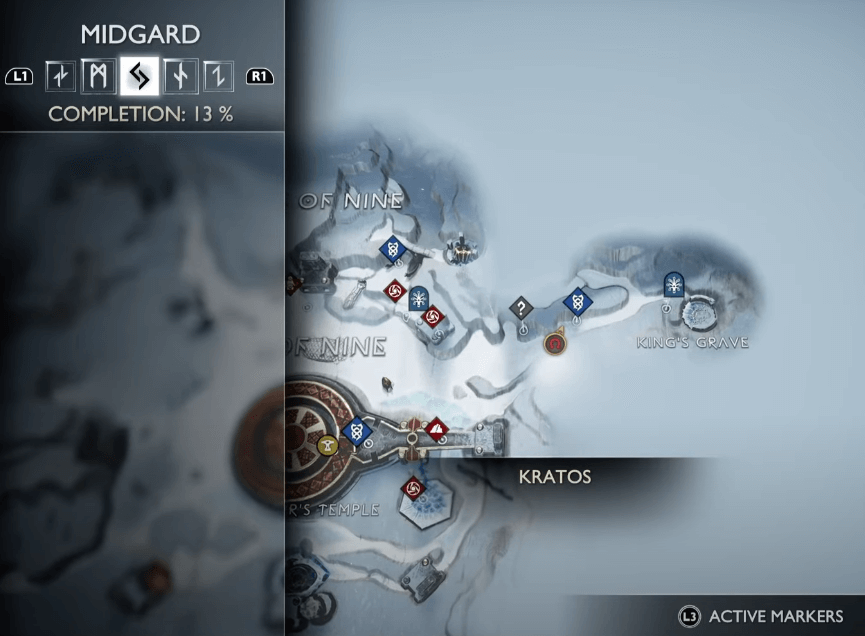
The “Lake of Nine” area in Midgard becomes unlocked after you finish the 9th main mission, The Word of Fate. You’ll need to explore the different ruins around the lake for a chance to find pieces of Guiding Light Armor.

Waist Guard

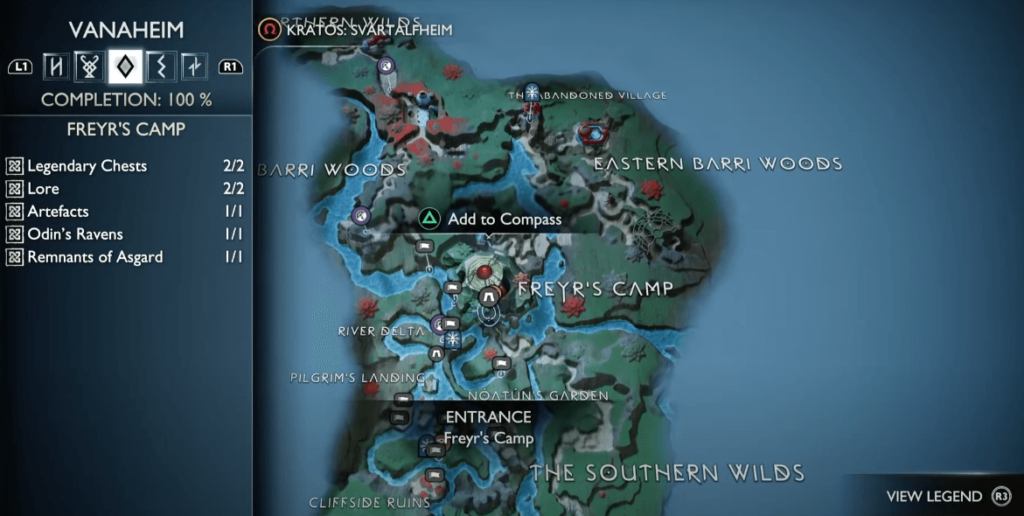
Start your search for armor pieces on the “shores of Nine.” Freya, also known as Woods and Frigg Witch, and Mimir, nicknamed the Smartest Man Alive, will join you on your quest. Start your journey, and don’t stop until you find the small entrance.

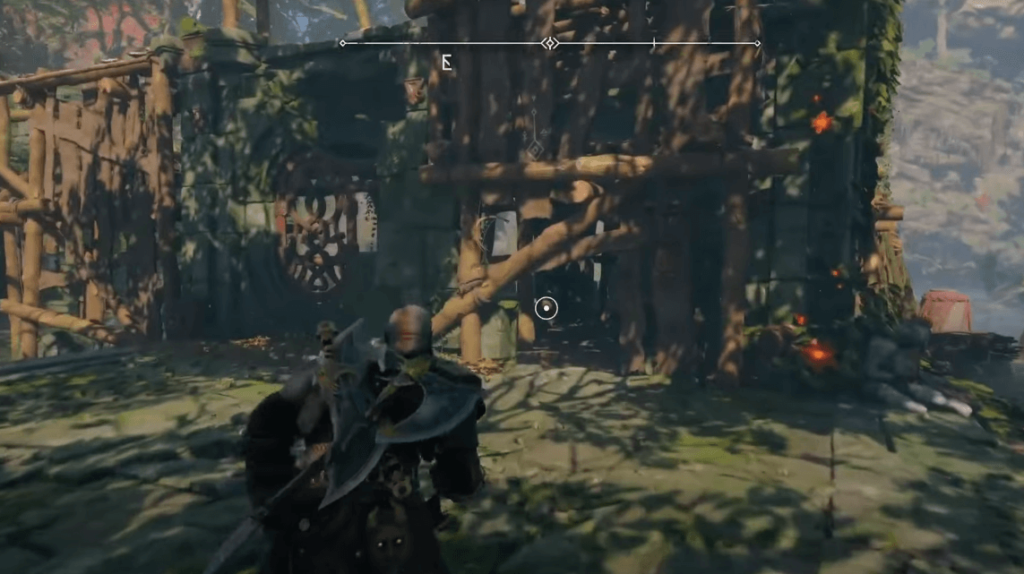
Once you enter, keep going straight through the broken pieces until you reach a giant open area. In the open area, you will see a blue light beam. Follow it until you find the source of the Light, which is coming from one of the ruin’s broken pieces, and then Press the “O” Key to interact.

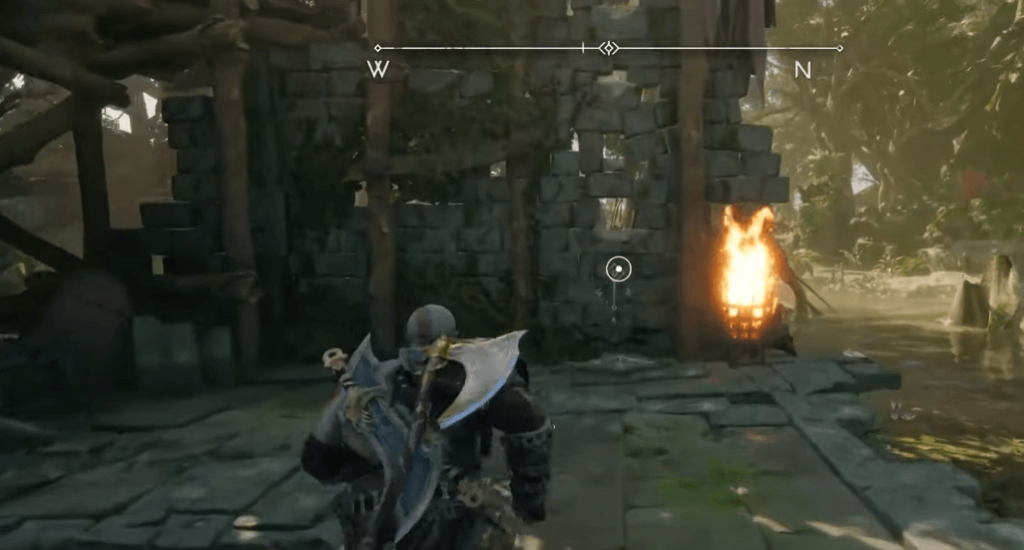
When the interaction is complete, it will reveal the text maker that will tell you the Guiding Light has begun. The message in writing says, “Iron peace, not a golden war.” Freya will tell you about the hardships Tyr faced during the war.

A text marker will now appear that says, “statue runes read 1 of 4.” You should get the Waist Guard of Guiding Light to improve Kratos’s fighting skills. Doing so, however, won’t be easy as you’ll need to take down enemies like Hel-walkers. Also, don’t forget to use your shield!

Gauntlets

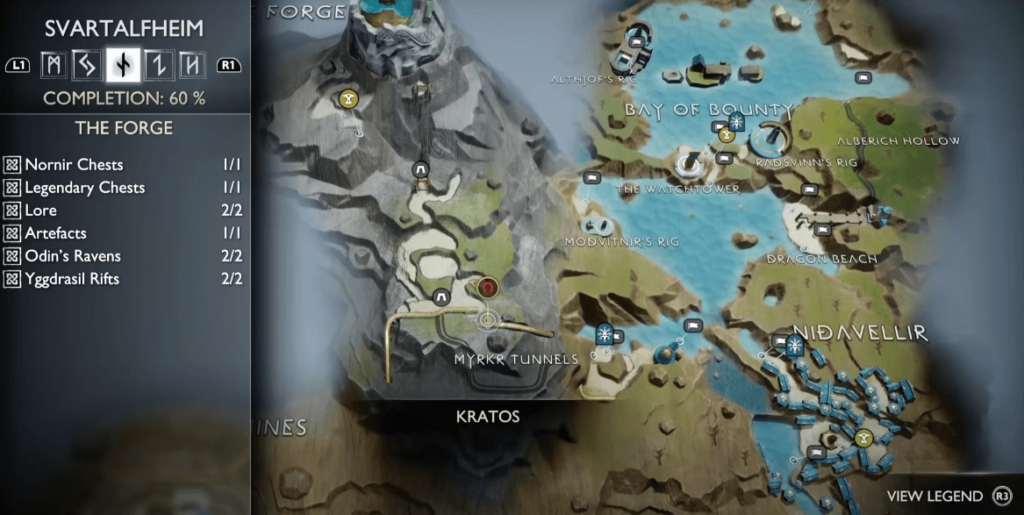
Follow the Marker on the map to reach the Northeastern side of the map to get the “Gauntlets of Guiding Light.” Your journey will begin from the location where you find the right bracers. After reaching the “Lake of Nine,” explore the nearby area and find the left bracer. For your assistance, you could use the sled and hit the pile of fresh snow and let the sled do a swift left turn once. Now go much deeper and deeper into the lake.

The “Gauntlets of Guiding Light” are located on the Northeastern side of the map. To begin your journey, find the right bracer at the starting location. Once you reach the “Lake of Nine,” explore nearby for the left bracer. You can use a sled to speed things up by hitting a pile of snow and making a sharp left turn when prompted. After that, make your way deeper into the lake.

Park, your sled, then look around for the next ruin. Freya will tell you when to stop and search through the rubble, which is probably from a statue of Tyr. You’ll see another light beam which you need to follow. After reading the writing on the statue, Kratos has a message for you: “Defend The Peace.” After you obtain your second statue of ruins, Freya the witch will recount a memory to you about Jotnar crafting bracers for Tyr’s statue. In doing so, both of you will receive 325 EXP in total.

Breastplate

After you get the left bracer and follow the next quest marker to start your hunt for a Breastplate, the sled is the best way to travel quickly in the snow. You can reach the Raider Stronghold by sled, which maps out the western side. Be careful, though; you will encounter several enemies along your journey who won’t be tough to defeat. When you finally reach the stronghold after a long battle, find a spot in the snow that isn’t blocked by anything and park your sled there.

As you move around, you’ll come across a giant golden ruin. You need to find Tyr’s Helmet, which has broken down his statue. Opening the helmet will reveal a light beam shining on a spot nearby. Kratos needs to decode the text with the help of Mimir in order to figure out what it means. The message is “Win minds, nor wars.” Mimir translates it for Kratos and reveals that the hidden message is that true battle is always for people’s hearts and minds.

Jotunheim’s Essence

The final piece is Jotunheim’s Essence, which you can find in the Stronghold Southern. However, on your way there, you will come across a that at the right end of the stronghold. Use the sled quickly and go downwards. Remember that the final quest marker is slightly off-center from where you are coming in, so be extra careful not to miss it when parking your sled! And finally, don’t stop moving until you find a light beam for direction.

Once you reach the light beam, go and interact with the item that comes your way. You will be in the right spot when Freya says, “isn’t this the spear from Tyr’s Statue?” Now Kratos’ work begins–finding whispering slabs after digging through snow and using the spear to decode a message that reads, “Wish for peace, be ready for war.” Freya will tell you that Tyr was always ready for war, but he never wished it would happen.

This is all we have got in how to get the Guiding Light Armor Set in God of War: Ragnarok. Be sure to see our detailed God of War: Ragnarok wiki page for more tips and strategies.

Categories
God of War: Ragnarok

How To Get Atlas Eruption Heavy Runic Attack In God Of War: Ragnarok

Runic attacks in God of War are very powerful indeed. While in Ragnarok, you do get some light runic attacks early on, you will need to progress the game and find the more powerful heavy attacks on your own. In this God Of War: Ragnarok guide, we cover how you can get the Atlas Eruption heavy runic attack for the Blades of Chaos.

Getting Atlas Eruption In God Of War: Ragnarok

The Atlas Eruption heavy runic attack can be found in the Forge in Svartalfheim. There is a Mystic Gateway that you can use to quickly get to the area.

Once you pass the gate head forward and take a right. Proceed forward and below the bridge. Take a right and then climb to the upper level. Freeze the geyser with the Leviathan Axe and jump back down. Get on the elevator and then recall the axe to go up. Now proceed left and climb up the ledge. Take a right and you will find the legendary chest that has the Atlas Eruption heavy runic attack inside.

This is how you can get the Atlas Eruption heavy runic attack for the Blades of Chaos in God Of War: Ragnarok. If you are interested in learning more then you can check out our guide on how you can get the Tartarus Rage heavy runic attack. For more content check out our God Of War: Ragnarok guides hub.

Categories
God of War: Ragnarok

How To Get Tartarus Rage Heavy Runic Attack In God Of War: Ragnarok

The Blades of Chaos are fun to use and while the game does give you a light runic attack early on, you will need to find the more powerful heavy runic attacks on your own. In this God of War: Ragnarok guide, we cover how you can get the Tartarus Rage heavy runic attack for the Blades of Chaos.

Getting Tartarus Rage In God Of War: Ragnarok

Tartarus Rage can be found inside a chest in the Raider Hideout in Midgard, near the King’s Grave.

Head into the hideout and down the stairs and you will be ambushed by a gang of raiders. Defeat them to progress further. Inside the hideout, you will find the legendary chest that has the Tartarus Ragenheavy runic attack for the Blades of Chaos.

This is how you can get the Tartarus Rage heavy runic attack in God of War: Ragnarok. If you are interested in learning more then you can check out our guide on how you can get Fog of Fimbulwinter heavy runic attack for the Leviathan Axe. For more content check out our God of War: Ragnarok guides hub.

Categories
God of War: Ragnarok

How To Get Fog Of Fimbulwinter Runic Attack In God Of War: Ragnarok

Runic attacks are some of the most powerful in the game and while the game does give you some early on, you will need to find the more powerful ones. In this God of War: Ragnarok guide, we cover where you can find the Fog of Fimbulwinter heavy runic attack for the Leviathan Axe.

Getting Fog Of Fimbulwinter In God Of War: Ragnarok

The Fog of Fimbulwinter heavy runic attack can be found in Myrkr Tunnels in Svartalfheim. You can use the nearby Mystic Gateway and then head toward the entrance of the tunnels.

Take the path down from the train and proceed forward and up again along the water canal. You will find a door in the ground that will take you underneath. Head down and then proceed forward.

Head past the barrels and then take a left. Then take another left and proceed forward to where the path is blocked. With the help of Freya, use the Blades of Chaos to clear the path. Just after this minor obstruction, you will find the chest with the Fog of Fimbulwinter heavy runic attack.

This is how you can get the Fog of Fimbulwinter heavy runic attack in God of War: Ragnarok. If you are interested in learning more then you can check out our guide on where you can find the Leviathan’s Roar runic attack. For more content check out our God Of War: Ragnarok guides hub.

Categories
God of War: Ragnarok

Where To Get Leviathan’s Roar Heavy Runic Attack In God Of War: Ragnarok

While you get light runic attacks pretty early on in the game, heavy runic attacks are harder to get. Leviathan’s Roar is a cool heavy runic attack for the Leviathan Axe and in this God Of War: Ragnarok guide, we go over how you can get it.

Getting Leviathan’s Roar In God Of War: Ragnarok

The Leviathan’s Roar heavy runic attack can be found in Freyr’s Camp in Vanaheim. You will visit this location as part of the main story.

From the camp, you need to take the path to Eastern Barri Woods, where you fight the Forest Ancient. If you have already defeated the boss then you need to head into the ruins on the right.

Jump to the next platform and then climb up and then drop down to the ground on the right. Once on the ground, you need to turn left and climb up the wall next to the brazier.

You will then need to do a bit of traversal but proceed ahead and you will find the chest that has the Leviathan’s Roar heavy runic attack inside.

This is how you can get Leviathan’s Roar in God Of War: Ragnarok. If you are interested in learning more then you can check out our guide on how you can get the Mists of Helheim heavy runic attack. For more content check out our God Of War: Ragnarok guides hub.