Categories
God of War: Ragnarok

Which Difficulty Should You Choose in God of War: Ragnarok

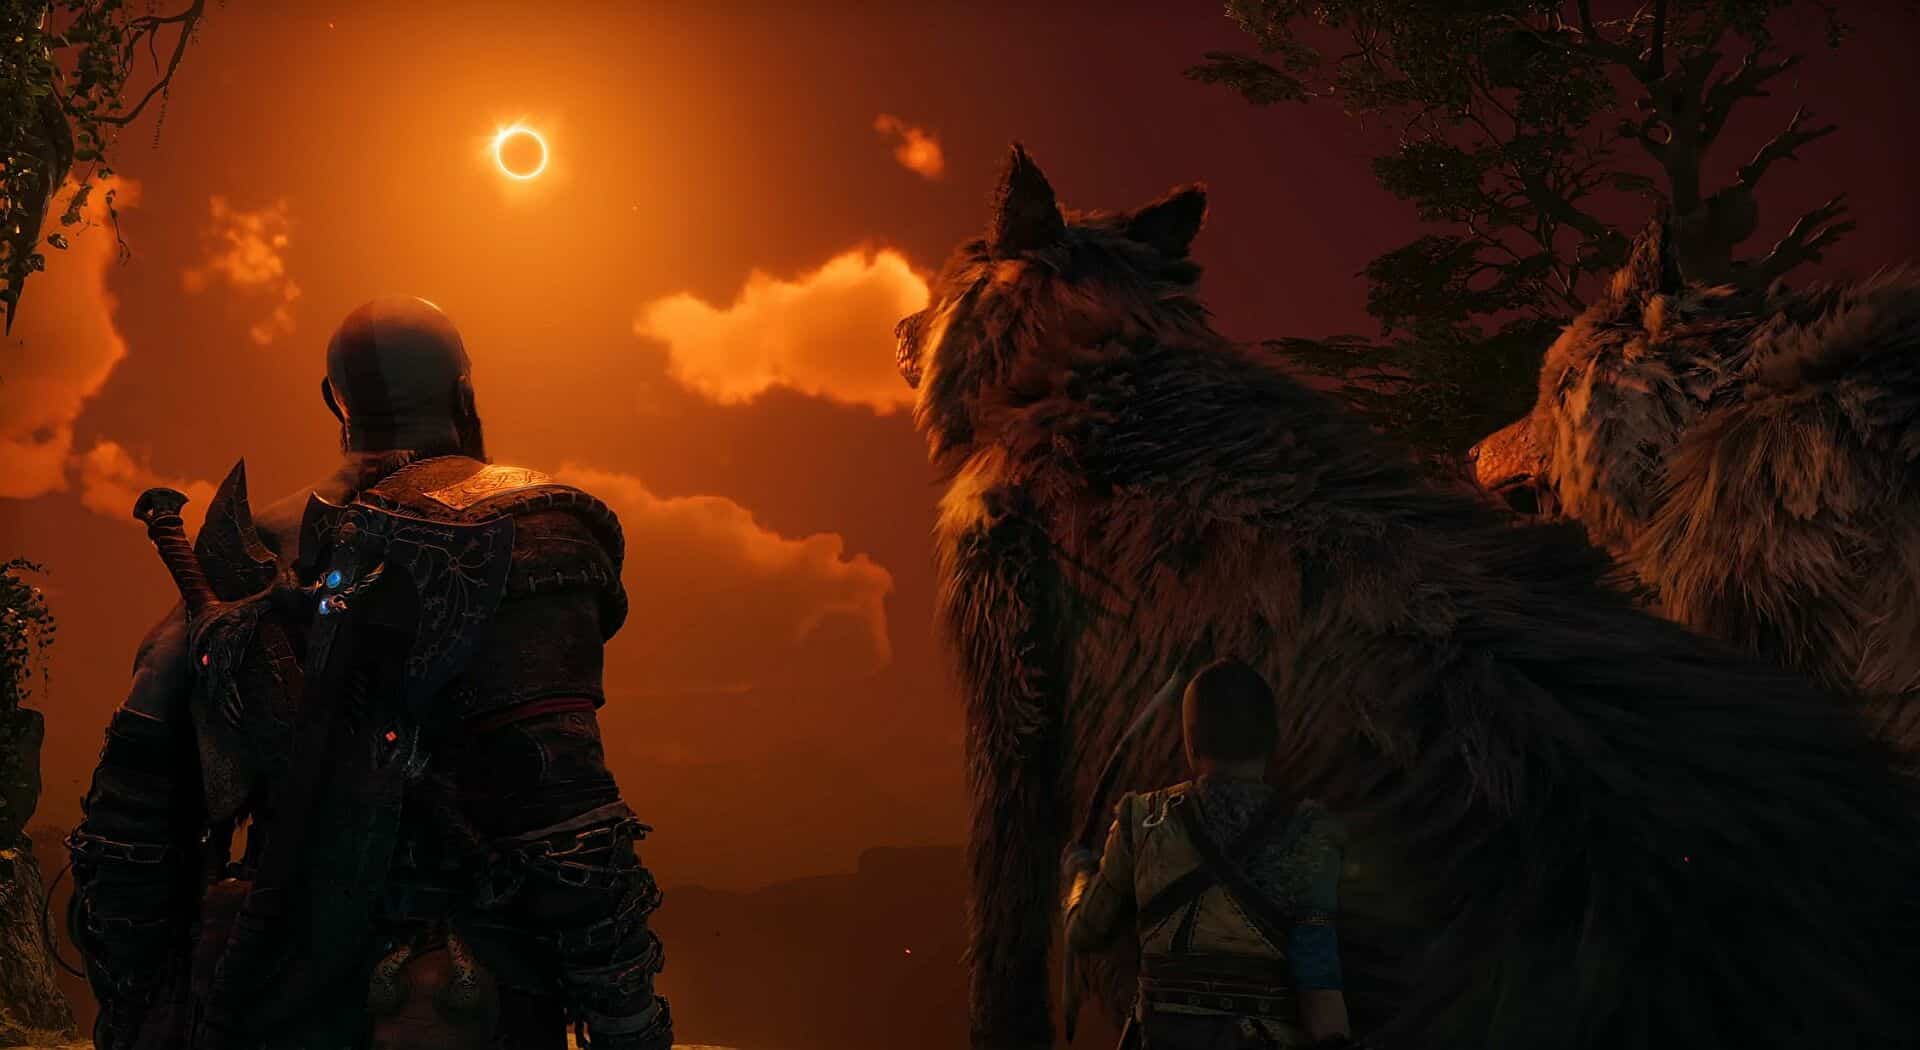
Similar to the original game, there are quite a few difficulty options in God of War: Ragnarok. Choosing the right difficulty will ensure that you enjoy the overall experience a lot more. There are people who enjoy the toughest challenges that the game has to offer and there are some who cannot be bothered and just want to enjoy the story. There are no difficulty-related Trophies as well so you can complete the entire game on the ‘Easiest’ option if you want and still get the Platinum. This guide aims to help you choose the right difficulty in God of War: Ragnarok so that you have an enjoyable experience with the game.

Before we begin, remember that you can also change the difficulty if you are finding the game too hard or easy — unless you are playing on Give Me God of War. To do that, simply go to ‘Settings’, click on ‘Gameplay’, and change it from there.

Give Me A Story
Games are meant to be fun. If you are the type of person who loves to have a good time after day’s of work, go with ‘Give Me A Story’ by all means. Story is easily one of the best aspects of God of War: Ragnarok and there is no need to deprive yourself of it by choosing the hardest difficulty from the get-go. If you love the game, you can always choose a tougher difficulty in your consequent playthroughs.

Give Me Grace
If you think you’re finding the game too easy on ‘Give Me A Story’, feel free to turn it up a notch. There will not be a huge leap in terms of difficulty but you will definitely notice some changes. If you are a new player who just wants to hack and slash your way through the game while enjoying the story, go with this difficulty option.

Give Me Balance
As the title suggests, this is what we recommend most people to go with. This difficulty will provide a good balance of challenge. You will not feel that you are dying in one-hit or doing the same to enemies — it is just perfectly balanced as all things should be.

Give Me No Mercy
This is the difficulty that we recommend to people who love SoulsBorne games. Even if you have sufficient time invested in the original God of War, you will be adequately challenged in this one because of new enemy types, different attack patterns, bosses, and whatnot.

Give Me God of War
If the first game is any indication, you should not start your journey with this one unless you like suffering. While it is far from being impossible, it is not something a lot of people will enjoy. We would recommend completing the game at least once before attempting this. Those of you who love a challenge, ‘Give Me No Mercy’ is much better for the first playthrough. Another important thing to keep in mind is that if you choose this difficulty, you will have to stick to it until the very end — it cannot be changed mid-game.

We hope this helped you make an informed decision when it comes to choosing a difficulty in God of War: Ragnarok. Also, feel free to stop by our God of War: Ragnarok wiki for more tips and strategies.

Categories
God of War: Ragnarok

God of War: Ragnarok Relics Locations Guide

There are 14 Relics / Sword Hilts in total that can be found in God of War: Ragnarok. You can only equip a single Relic at any given time but once equipped, it provides an incredibly powerful ability that can be unleashed by holding L1 + Circle. It is also important to note that these abilities have fairly long cooldowns. In addition to this, these Sword Hilts can also be upgraded to get various benefits such as decreased cooldown time, increased effect, etc. Most of these Relics are tied to different Favors in God of War: Ragnarok that can be completed after you are done with the story. This guide will show you the locations of all the Relics / Sword Hilts that you can get in God of War: Ragnarok.

Relic / Sword Hilt Where to Find Effect Cooldown
Hilt of Dainsleif It can be crafted with Svefnthorn which can be dropped by Ormstunga during a Favor called ‘The Lost Treasure’. You slam the ground to create an explosion of Seior Poison, leaving behind a hazard. Once upgraded, it increases the amount of Hazard. 157 Seconds.
Hilt of Skofnung This one is really hard to get as it requires you to defeat Hrolf in King’s Grave, Midgard. Also, do note that it can only be accessed after completing all the Berserker Gravestones. It unleashes the power of the souls within the sword. You can upgrade it to increase the strength of the effect. 256 Seconds.
Hilt of Angrvadall You can craft it with Skirnir’s Gambanteinn that is acquired during a Favor called ‘The Desert Door’. You slash forward with 3x waves of light that deal increased damage against enemies that are afflicted with Sonic. Once upgraded, it reduces the cooldown. 142 Seconds.
Hilt of Ridill This can be crafted with Crackle of Bilskirnir that you can get during a Favor called ‘Animal Instincts’. You unleash a wave of Shock to electrify enemies. You can also upgrade it to increase the AoE of the electrocution.  142 Seconds.
Glaive of Dodher You unlock it automatically after defeating Fiske in The Reckoning. You toss a Bifrost Chakaram that continues to swerve into enemies. Once upgraded, it gains an additional number of Chakarams that can be tossed. 94 Seconds.
Huldra Project #9 You can craft it at the Blacksmith by spending a bunch of Hacksilver. You can turn Mimir’s discomfort into a Bifrost Blast that deals a huge amount of damage to nearby enemies. You can upgrade it to increase the strength of the effect. 189 Seconds.
Mystical Heirloom It can be found in Lake of Nine, Midgard. You will find it behind a destructible wall, right next to a corpse. It awakens something dormant inside the bearer. It cannot be upgraded. 16 Seconds.
Hilt of Forsbrandr This one is pretty tedious. First, you must find all 48 of Odin’s Ravens. After you have done that, you will need to open 6 Legendary Chests at The Raven Tree, Nilfheim. This will cause ‘The Raven Keeper’ to appear. After you defeat it, you will get the Hilt of Forsbrandr. You can knock enemies back and get an Aura of Protection. It can also be upgraded to get increased duration. 94 Seconds.
Hilt of Tyrfing You need to defeat Blatonn in The Abandoned Village to get Nar’s Cup. Once acquired, you will be able to craft it. You can charge the sword to sacrifice some HP in order to get bonus damage — the amount of bonus damage gained depends on the HP sacrificed. You can upgrade it to reduce the cooldown. 59 Seconds.
Talisman of Meign You can get it during The Quest for Tyr from a body in the wall. You get additional Melee Damage for a short while. You can also upgrade it to increase the duration. 94 Seconds.
Hilt of Gram You need to head over to the Temple of Light, Alfheim. Once there, you will find a Legendary Chest during the Twilight Stone puzzle. It can be found inside that chest. You gain Rage and stun all nearby enemies. It can be upgraded to increase the amount of Rage gained. 94 Seconds.
Hilt of Hrotti You need to defeat any 2 of 3 Oath Guard mini-bosses that can be found in The Plains, Vanaheim. You can apply a mark onto nearby enemies. Attacking the marked enemy decreases the Runic Cooldown of the equipped weapon. If you kill the marked enemy, you will get a Blessing of Runic. Once upgraded, it increases the duration of the mark. 142 Seconds.
Motsognir’s Call To be updated. You create a shockwave that deals high Stun nearby enemies. You can also upgrade it to increase the strength of the effect. 157 Seconds.
Hilt of Hofud This one is acquired after defeating Heimdall during Creatures of Prophecy. You can distort space and time by creating a Realm Shift. 205 Seconds.

After you have collected all 14 Relics, you will get the ‘Collector’ trophy which is needed to get the 100% completion status.

These are all the Relics’ locations in God of War: Ragnarok. For more tips and strategies, you can check out our detailed God of War: Ragnarok wiki page.

Categories
Guides

Fix Disney Dreamlight Valley Crashes at Launch

Disney Dreamlight Valley has recently taken over the gaming community because of its sweet gameplay and interesting story. Unfortunately, many players are experiencing that whenever they try to launch the game, it either crashes or doesn’t launch. This irritates players who have bought the game but are still unable to play. If you are one of those people, don’t worry because this guide has everything you’ll need to find your way around these crashing issues.

How to Fix Disney Dreamlight Valley Crashing at Launch

If you play Disney Dreamlight Valley on a PC, try the following fixes.

Fix #1: Try Turning Off Full Screen Optimization

Open Disney Dreamlight Valley’s installation folder. Left-click on the application and click on properties. After the page opens, locate and open “compatibility”, and a checkbox will be below “Disable Full Screen Optimization”. Tick on the checkbox and click on apply. Restart your PC before launching Disney Dreamlight Valley again.

Fix #2: Try Updating Windows

Sometimes these errors happen because your Windows is too outdated. Go to the Taskbar Search and type Windows Update. You will be taken to the updates page, where you can scan and update your Windows.

Tip: If you’re having driver issues, we recommend DriverFix to scan and update all your outdated drivers in just one click. DriverFix solves your issues faster; it is easy to use and lets you know whenever a driver update is available. Download updates from popular brands, 100% malware and virus free.

Fix #3: Try Repairing Microsoft Visual C++

You might also wanna try reinstalling your Microsoft Visual C++. You can do so by following these steps:
Head over to Google and search “Microsoft Visual C++” download the latest version and install it. If you have 32-bit Windows, download a 34-bit version; if you have 64-bit Windows, then download the 64-bit version.

Solutions for Disney Dreamlight Valley Crashing on Xbox

If you play Disney Dreamlight Valley on an Xbox, try the following fixes.

Fix #1: Reinstall The Game

These errors can be solved by reinstalling the game again, and you can do so by heading over to “My games and apps”, clicking on games, and selecting Disney Dreamlight Valley. Click on the “more option” and uninstall the game. Once the game has been uninstalled, reinstall the game and check to see if the error has been solved.

Fix#2: Clear All Cache

Try clearing cache data on your Xbox by unplugging your Xbox for a few mins and plugging it back in. Turn the console back on the see if the problem is resolved. If not, try the next fix on the list.

Fix #3: Try Updating The Game

You can even try seeing if any updates for the game are available. Go to “My games and apps”, click on “manage,” and click on “updates”. Locate Disney Dreamlight Valley and update it. Once it’s updated, try launching the game again and hope for the best.

We expect you’ll no longer be facing any issues by following the fixes, and now you can play Disney Dreamlight Valley in peace. If you have any other fixes for our readers, drop them in the comments below.

Categories
Guides

Harvestella Romance Guide

Having someone by your side as you try to protect the world from impending doom can be a blessing. As you go around defeating monsters, farming crops, and just being a nice person in general, you will be able to foster friendships with a few different NPCs. These friendships can be grown into full-fledged romantic relationships, even leading to marriage. But how do you go about it? In this Harvestella guide, we have explained everything there is to know about the different Romance Options available to you.

As you progress through the story, you will continue to increase the Friendship Level with different romance-able characters. You need to max out the Friendship Level by completing requests, etc. After you have maxed out the Friendship Level, you will be able to unlock the ‘Partnership Event’ which is essentially marriage. However, do note that the ‘Partnership Event’ can only be accessed after completing the main campaign.

Your desired partner will start to live with you once the ‘Partnership Event’ is completed. As of right now, we do not have any info. on polygamy but we will update the guide after we have learned more. As for characters that you can romance in Harvestella, these include:

  1. Asyl — A member of the Argus Brigade who lives near the Spring Seaslight.
  2. Shrika — A stout worshipper of the Seaslight who is more than willing to lend a hand whenever needed.
  3. Emo — A mysterious character from the Tavern of Shatolla.
  4. Aria — A scientist who somehow ended up right next to you … and for good reasons.
  5. Istina — She is a teacher at an orphanage in Nemea Town.
  6. Heine — He can be found working on something in his workshop in Shatolla.

Lastly, do note that Harvestella does not restrict you when it comes to romance options. You can choose any gender in the beginning and still romance whichever NPC you love the most.

These are all the Romance Options in Harvestella. We have also got more tips and strategies in our detailed Harvestella wiki page.

Categories
Guides

How to Make Money Fast in Harvestella

Harvestella is a large, open world with many different areas to explore. To progress through the game, you will need to earn money by completing tasks and selling items you find. Money is also needed to purchase upgrades and new equipment. In this guide, I’ll tell you how to make money fast in Harvestella.

Making Money Fast in Harvestella is Easy; Here’s How

Selling Crops: One of the best ways to make money in Harvestella is by selling crops you’ve harvested from plants. You can get a reasonable price for them at the market. And if you’re worried about seeds, don’t worry—there are ways to earn free seeds. You can talk to NPCs and chests and wait until they come to your mailbox via courier.

Find Treasure Chests: Another great way to make money in Harvestella is by finding and looting treasure chests. You can find these chests worldwide, which usually contain a good amount of money. Check every nook and cranny because you never know where a chest might be hiding.

Forage Items and Then Sell: Foraging is the way to go if you want to make money without putting in too much effort. As you explore the forest, keep an eye out for any drops that enemies may leave behind or mushrooms/berries that can be collected. Once you have a good collection of items, you can sell them at the market for a profit. On average, enemies will drop 100 Grilla per item, while mushrooms and berries give 20 Grilla each.

Selling Recipes: Making money from cooking is easier than you think! Just start cooking in your kitchen. But before you get started, renovate your countertops with the help of a Renovator in Lethe Village. Once you’ve made a few meals, sell them for profit. You can also progress through cooking courses to unlock even more valuable recipes. Some of the most popular include juicers and flour mills.

Selling Fish: Fishing is a great way to make money, and it’s also one of the most relaxing activities in Harvestella. To start fishing, you must purchase a fishing rod and get a fishing license. Once you have your rod, find a body of water and cast your line. Then, you can sell the fish you catch at the market for a higher profit.

Side Quests: There are many side quests available in Harvestella, and most of them will reward you with at least 1,000 Grilla. These quests can range from simple fetch quests to more complex tasks, so be sure to choose ones you’re confident you can complete. To find these quests, talk to NPCs and look for the exclamation points above their heads.

Selling Extra Raw Materials: If you find that you have a lot of raw materials and don’t need them, sell them for profit. You can get a reasonable price for raw materials at the Shipping Container, so it’s worth your while to sell them if you don’t need them.

Complete Job Board’s Task: Go to the Lethe Village and find the Job Board next to Cres’s residence. Then, interact with Cres so she can give you a task, complete it, and claim your prize. Usually, the reward ranges from 1,000 – 3,000 Grilla.

If you need more help, here are more Harvestella guides you may like:

Categories
Guides

How To Raise Livestock In Harvestella

Harvestella is a game that simulates the process of raising livestock. The game aims to produce food for the player’s settlers by growing crops and raising animals. In this guide, I’ll tell you how to raise livestock In Harvestella.

The Conellu Emporium is a Lethe Village vendor selling livestock feed and the Totokaku mount. You can unlock it by collecting a Conellu Doll from Higan Canyon in Chapter 2. However, you cannot purchase livestock from him the first time you unlock the Conellu Emporium. You need to build pens before you purchase livestock from the vendor.

How To Build Livestock Pens

You can only initially keep three livestock in one pen, but you can build more pens as you go. Head towards the Lethe Village’s southern edge and speak with the Renovator to get started. Each new pen takes a day to construct and cannot be used instantly, so plan accordingly. You are also limited to building only one new pen per day.

To purchase Cluffowl or Woolum, you need the following:

  • 5,000 Grilla
  • 5x Lumber
  • 5x Hard Stone

The things mentioned above are for constructing a website from scratch–not upgrading an existing one. Upgrading will cost significantly more.

How To Purchase and Feed livestock

Purchasing: The Conellu Emporium offers Cluffowls for 500 Grilla and Woolums for 900 Grilla from the Conellu Emporium. Cluffowls lay eggs, while Woolums produce milk but not immediately. It’s important to note that there is a limit of one purchase per day from the vendor.

Feeding: The Conellu Emporium is the only vendor that sells Cluffowl and Woolum feed for 100 Grilla each.

How Can Livestock Production Be Increased

Daily pet your animals affectionately to increase livestock production, which you can check by visiting the signboard outside their pen. The higher the affection rating, the better your production will be.

That concludes our Livestock guide, but if you need more help, check out Hammer crafting guide.

Categories
Guides

How to Craft a Hammer in Harvestella

A Hammer is a fundamental tool in Harvestella. It can serve various purposes, like building anything, from new construction to clearing more land for farming. In this guide, I’ll show you how to craft the Hammer in Harvestella.

Crafting a Hammer in Harvestella is Easy

You won’t start the game with a hammer or automatically receive one from Cres, so you’ll have to craft it yourself. The only thing Cres will do is tell you when you need to craft the hammer. To craft the hammer, you need to collect the 10x Hard Stones and then go to the inventory to begin the process.

The Hard Stones you are looking for can be found near Njord Steppe. These stones aren’t anything special that requires you to work hard. They are very common and easy to get. Quickly travel to the east side of the Njord Steppe. You will see that some nodes contain Hard Stones. Mine these nodes to obtain the stone.

The only drawback when you arrive at the Hard Stones farm is that there won’t be enough nodes available to craft the hammer in one sitting. However, you will be happy to know that the nodes respawn daily. Even though it takes some time to craft a hammer, it is not difficult. You need to mine the node’s daily limits and go back home to sleep for one day before returning mine more nodes. Repeat this process until you get 10x Hard Stones.

As you can see from the map, many rock symbols represent Hard Stone mining locations. So it is easy to find and mine these stones. To get more opportunities to mine Hard Stones, visit as many mining spots as possible.

Need more help? Visit our Harvestella Guides hub for more.

Categories
Bayonetta 3

Bayonetta 3 All Witch Hearts Locations Guide

“Witch Hearts” are a key ingredient in crafting the single or full Witch Hearts in Bayonetta 3. They can also be used to upgrade your health. In this guide, I’ll show you where to find all the Witch Hearts in Bayonetta 3.

All Witch Hearts Locations

Chapter 1 – Scrambling For Answers

Witch Heart #1: You will find the first Witch Heart in an open area while playing Verse #2. Use Gomorrah’s bite 3x to earn it.

Witch Heart #2: You will know you are finishing Verse #3 when you take a left turn and see a massive floating key. Walk towards the waterfall and unlock the door to retrieve your Wich Hear.

Witch Heart #3: You will find a secluded path at the bottom of the road after you Rodin for a demonic pulse. As a result, you will get your Wich Heart.

Witch Heart #4: The game will notify you when the first scurried is available. The exact location of the scurrier is in the tunnel where the crash is sited; go there to get Wich Heart.

Chapter 2 – City On Fire

Witch Heart #5: On the left-hand side, you can find the Witch Heart at the beginning of Chapter 2. Let Phantasmaraneae grab it for you when she’s available.

Witch Heart #6: Reach the open area near the Umbran Crow so that “Time Trial” opens, and you will earn Witch Heart.

Witch Heart #7: On the North Side of the Umbran Crow, there is a wall where you find the Witch Heart hanging over.

Witch Heart #8: Finish the Verse #4 fight scene and explore the nearby areas to get Witch Heart.

Chapter 3 – A Sinking Feeling

Witch Heart #9: By following the cat, you will reach the building’s opposite side, and at the top, the Scurrier will give you Broken Heart.

Witch Heart #10: Take down the robot to get its chest on which you find the Witch Heart.

Witch Heart #11: To get the Witch Heart, travel to Verse #5 and complete the level.

Chapter 4 – A World’s Apart

Witch Heart #12: After you finish your first battle, walk to the left edge of the cliff. You will find a chest with a time trial on the platform.

Witch Heart #13: The Witch Heart is obtainable by finishing the challenge and using Crimson Rim Charge. Then, when you get to Verse #7, there will be a weapon that you can use to clear everything out with one hit.

Witch Heart #14: There is a building in front of you that you need to reach to get Witch Heart.

Chapter 5 – Hot Pursuit

Witch Heart #15: Finish off Verse #7 challenge and bead the regeneration ability to get Witch Heart.

Witch Heart #16: Strike the chest with all your might when you see it moving to receive a Witch Heart.

Chapter 6 – Off The Rails

Witch Heart #17: Strike the chest with all your might to finish off the “Time” challenge and then gather its pieces to receive a Witch Heart.

Witch Heart #18: There are many chests in Verse #5’s challenge portal. From the first chest, get the magic source, and use Infernal Demon to break open the chests. Doing so will result in receiving the Witch Heart.

Chapter 7 – Burning Sands

Witch Heart #19: Proceed along the main path and find a moving platform on your right. This will take you to the chest containing the Witch Heart.

Witch Heart #20: In Verse #7, building, you find plenty of collectibles, one of which is the being Witch Heart. To get it, to reach the two pillars with the red thing.

Witch Heart #21: Climb the stairs to reach the top of the building and find a chest. Inside will be the Witch Heart.

Chapter 8 – A Croaking Chorus

Witch Heart #22: Make your way to the beginning of Verse #1 and keep going until you reach the top. You’ll find a chest with magic there – this will let you use your demon attack. Use your attack to break open the chest buried in the sand, and inside you’ll find a Witch Heart.

Witch Heart #23: To find the Witch Heart, go to the temple with an Umbran Cat and look for a chest. Then, use Infernal Demon Attack to smash it open and retrieve the Heart.

Witch Heart #24: To obtain Witch Heart, complete Ball’s Rain Song Combat challenge in Verse #6.

Chapter 9 – Learning To Fly

Witch Heart #25: Find the Malphas Hanging at the temple’s top and complete Verse #3 to get Witch Heart.

Witch Heart #26: As you complete your Verse #8 combat challenge in the room, you will receive a Broken Witch Heart for your work.

Chapter 10 – Cover of Night

Witch Heart #27: From the tower top, cross the bridge to find Summon Barrier. Behind a small turret is a door that can be unlocked with a key collected earlier. After entering, smash the chest inside to get Witch Heart.

Witch Heart #28: Reach the moving platforms to active “Time Trail Puzzle,” and you will get Witch Heart as a reward.

Witch Heart #29: Walk towards the main Parisian strip on your left, which will take you to Verse #7 portal combat challenge point. Here you will find Witch Heart.

Chapter 11 – A Familiar Dance

Witch Heart #30: Reach the Gates of Hell portal opposite side to find a chest. The first chest will take you to a floating platform where you can grab another chest. In this second chest, you’ll find a magic source that will help you perform your demon attack on the third chest—and once that’s broken open, it’ll give you Witch Heart.

That’s everything you need to know on where to find all Witch Hearts. If you need more help, here are some more Bayonetta 3 guides you may find helpful:

Categories
Guides

How To Get an Empty Vial In Disney Dreamlight Valley

Disney Dreamlight Valley allows players to convince Ursula (the main antagonist from the Little Mermaid) to come with them. She urges you to complete the Lair Sweet Lair quest. For this quest, you will require to get papers, magic scrolls, and ink.

Paper is an easy resource, but getting the other two is trickier. You will have to use your crafting skill for those to be acquired. Now for that ink, you need to possess an empty vial in which to store the ink.

Craft Vials: Crafting Vials in Disney Dreamlight Valley requires you have 3x Glass. This is an obstacle, as glass is not purchasable or something you find randomly; you have to craft the glass itself.

Craft Glass: For glass, you need to find a resource called Coal Ore and Sand Ore, abundant in the Dazzle Beach area. You will have to get 1x Coal Ore and 5x Sand Ore. Now, you will have to head to the beach to get these ores. You need to start digging to get Sand Ore. To get the Coal Ore, you need to destroy black rocks.

Once you have the required materials, make your way to a crafting table. To craft glass, you must see the Redefined Material category and craft 3x Glass. Once you have done that, you can craft a vial.

That is all for our Disney Dreamlight Valley guide with tips on how to craft an Empty Vial. For more on the game, see How To Unlock New Biomes and How to Get More Storage Space.

Categories
Overwatch 2

How To Complete The Knock Knock Challenge In Overwatch 2

Recently, Overwatch 2 had several events such as the Halloween Terror event. One of the most played challenges in it is the Knock Knock challenge many players struggle to win, but are persistent because everyone wants to get Kiriko’s new voice line. That’s why in this guide, we’ll show you exactly how you can cover the Knock Knock challenge.

How To Complete The Knock Knock Challenge

In order to complete the Knock Knock challenge, players will need to play “Junkenstein’s Revenge: Wrath of Bride” in PvE mode. As soon as the mode starts, players will notice that they are in a Halloween-themed version of Eichenwalde. You will need to reach the tavern all while fighting different types of bots and enemy team players who’ll be spawned randomly on the map.

When the players reach the tavern, they will need to defeat the bots guarding it and wait for the doors to open. As the doors to the tavern open, players will need to enter through them and make their way up to the next floor. Once they’ve reached the next floor, they will see two doors, one on the left and the other on the right. They should interact with the door on the right side. Interacting with the door will make the player knock on it, knocking on the door 4 times will complete the challenge and the players will receive Kiriko’s new voice line.

Note: Overwatch 2 players can complete this challenge at any time whilst playing Junkenstein’s Revenge mode as long as they enter the tavern and knock on the door four times.

Hope this guide has helped you in completing the Knock Knock challenge and you have now successfully received Kiriko’s new voice line. Make sure you follow all the steps and do not miss any. If you need more help, here are some more Overwatch 2 guides you may like: